Monthly Archives: March 2014

Menu Plan Monday

Standard

I can’t believe it is the last day of March!  Hopefully in April, we will be rid of this snow and it brings us lots of sun and warm weather. I think we are all ready for it. We are itching to get out and rake the yard, prepare the garden and clean out the flowerbeds. With it being April Fool’s Day tomorrow, I thought I would include a few fun links for fun food tricks. I want to do something for the girls but haven’t decided what to do yet. Check these out!

http://media-cache-ec0.pinimg.com/originals/90/95/f2/9095f2ce7317d1e6f853914684b3a82a.jpg

http://kitchenfunwithmy3sons.blogspot.ca/2013/03/30-of-best-april-fools-fun-food-prank.html

http://www.flickr.com/photos/50806695@N04/13315700855/


So, here is my menu plan for this week. Enjoy!

March 31st-April 6th

Monday- Chicken Parmesan / Rice/Peas

Tuesday- Tuna Burgers/Homemade Fries/Veggie Stix

Wednesday Vegetable Beef Barley Soup/French Bread

Thursday- Mushroom Lasagna Roll Ups with Cauliflower Sauce / Salad

Friday- Leftovers

Saturday- Sweet and Sour Chicken /Broccoli/Rice

Sunday- Oven Baked Cod / Carrot Fries/ Edamame


I hope you all have a great week!

Yum Yum!

Standard

I made this for my dad’s birthday one year and it was delicious! It does take a bit of prep work but it was actually pretty easy to do and I will definitely make it again. Perfect for a summer dessert.


__________________________________________________________________________________________

Banana Split Ice Cream Cake

_________________________________________________________________________________________

20 whole Oreo Cookies

4 Tablespoons Butter, Melted

4 whole Bananas

1 pint Strawberry Ice Cream

1 pint Vanilla Ice Cream

1 jar (about 16 Oz. Jar) Hot Fudge Sauce

1 container (16 Oz. Container) Frozen Sliced Sweetened Strawberries, Thawed And Drained

Fresh Whipped Cream, For Serving

Crushed Pineapple, For Serving


Directions

  1. Take out the strawberry ice cream to thaw. Place the Oreos in a gallon Ziploc bag and crush well with a rolling pin or small frying pan. Pour the melted butter into the Ziploc bag and mix it up. Press this crumb mixture into the bottom of a springform pan.
  1. Slice the bananas into 1/2″ rounds and arrange in a single layer on top of the crust. (Use as many banana slices as needed to fill the layer.) Place the pan into the freezer for about 10 minutes.
  1. Scoop the softened strawberry ice cream in small scoops on top of the frozen banana layer, smoothing it together with a spoon dipped in warm water. Return to the freezer for 1-2 hours, until the ice cream is firm again.
  1. Take the vanilla ice cream out of the freezer to thaw. Warm the hot fudge sauce slightly, just until it is easily spreadable. Pour the fudge over the strawberry ice cream layer, smoothing the top, and place back into the freezer for 15 minutes or so, until the fudge has firmed up again.
  1. Scoop the softened vanilla ice cream in small scoops on top of the fudge layer, again smoothing it together with the back of a spoon dipped in warm water. Cover with plastic wrap and return to the freezer for at least another 4-6 hours until very firm. (At this point the cake could be frozen, well wrapped, for a week or longer!)
  1. Pour the drained sliced sweetened strawberries into a bowl and crush with a pastry blender or a fork until the berries are all mashed up. Store in the fridge until almost ready to serve the cake.
  1. Spread the crushed berries over the top of the cake, to within one-half inch of the edge. Serve with fresh whipped cream and crushed pineapple for those who want it!


Prep Time: 8 Hours
Yields: 12 servings

__________________________________________________________________________________________

Source: http://arthomas.blogspot.ca/2010/01/banana-split-ice-cream-cake.html

__________________________________________________________________________________________

Yum Yum!

Standard

__________________________________________________________________________________________

Tuna Burgers

_________________________________________________________________________________________

2 (6 oz.) cans flaked tuna, drained

½ cup panko bread crumbs

¼ cup green onions, finely chopped

3 Tbsp. fresh parsley, minced

2 cloves garlic, minced

¼ tsp. salt

¼ tsp. pepper

Juice of ½ lemon

3 Tbsp. sour cream

1 egg

4 English Muffins

1 small tomato, sliced

lettuce


Directions:

  1. Combine tuna, bread crumbs, green onion, parsley, garlic, salt, pepper, lemon, sour cream, egg, and mix well with your hands.
  2. Form into 4 patties (they will be wet).
  3. Place on a greased baking sheet and bake for 20 minutes at 400°.
  4. Serve the burgers on toasted English muffins with romaine and sliced tomato.
  5. Spread additional sour cream on each burger, if desired.


Yields: 4 Burgers


__________________________________________________________________________________________

Source: Unknown

__________________________________________________________________________________________

Yum Yum!

Standard

__________________________________________________________________________________________

Pumpkin Chocolate Chip Cookies

_________________________________________________________________________________________

1/2 cup butter

1 cup canned pumpkin

1 cup sugar

1 egg, beaten lightly

1 tsp milk

1 tsp vanilla extract

2 cups all purpose flour

2 tsp baking powder

1 tsp baking soda

1 tsp cinnamon

1/2 tsp salt

1 cup chocolate chips

Directions


  1.  Preheat oven to 375F.
  2.  Place butter in heat proof glass dish. Cover and microwave butter on high power for 30 seconds.
  3.  In a large bowl mix together pumpkin, sugar, melted butter, beaten egg, milk and vanilla.
  4.  In a separate bowl combine flour, baking soda, baking powder, cinnamon and salt.
  5. Add pumpkin mixture and mix until smooth. Stir in chocolate chips.
  6. Drop from a teaspoon onto a lightly greased baking sheet. Line up about 1 1/2 inches apart.
  7. Bake for 10-12 minutes until golden brown. Cool on baking sheet for 2 minutes, then remove to wire rack for cooling.


Yields: 3 dozen

__________________________________________________________________________________________

Source: Unknown

__________________________________________________________________________________________

Aside

BUCKET LIST – No. 4

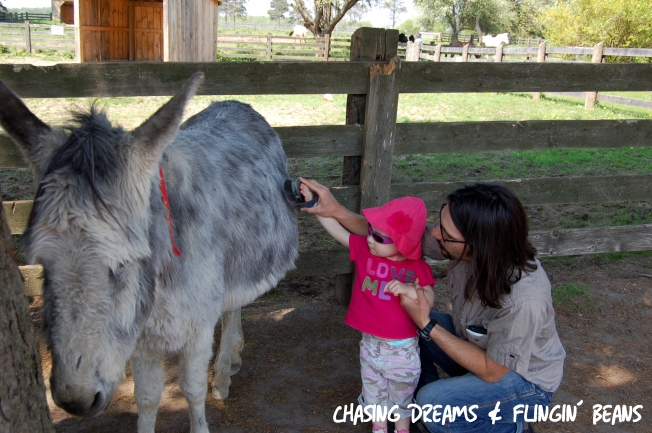
I adore donkeys! I don’t know what it is about them but I “LOVE” them. I think they are adorable, fun and they have been a part of some memorable times in my life. I don’t own any, although at one point in my life I thought it would be pretty cool to have a donkey farm. Maybe it’s the fact that they are a bit like me… STUBBORN. We have something in common.

My bucket list item for today is… to volunteer at a donkey sanctuary. It just so happens I have been to two of them. In 2009, I ended up going on a girl’s trip (kind of last minute) to Aruba. We all did some research and tried to fit in something that someone wanted to see or do while we were there. I discovered that they had a donkey sanctuary in Aruba and that is where I wanted to go. So, one day we rented jeeps and drove everywhere. We finally found the sanctuary but unfortunately it was closed for the day 😦  The donkeys, however were out so we got to have a little interaction with them on the other side of the fence. Yes, I was disappointed as I  would have liked to go in and talk to someone but it just didn’t happen. I was happy to give a little love from the other side…

http://main.arubandonkey.org/portal/    and   https://www.facebook.com/donkey.sanctuary.aruba

donkey aru2donkey aru4

donkey aru3donkey aru1

Donkey Sanctuary Aruba– March 12, 2009

Last year, while trying to find something to do with the kiddies, I discovered that we had a Donkey Sanctuary of Canada. How did I not know about this?! To make it even crazier, it is only about a 1 hour drive from me! I can’t believe I didn’t see/hear about this place. As soon as I saw it, I knew that’s where we would go…and we did! I loved it. We had a great afternoon learning about all the donkeys and their stories. It is a beautiful working farm. We discovered they also have volunteer days where you can go and help out with the donkeys.

As soon as my girls get a little bit bigger, I plan on crossing this off my bucket list (maybe a few times). I think it would be good to volunteer every year so I can get a few cuddles in as well.

donkey can2donkey can1

donkey can3

donkey can5Donkey Sanctuary of Canada

May 19, 2013


“FUN” Friday- Donkeys Donkeys

Aside

I’m not going back too far today- only 3 years. However, it feels like a lifetime ago! George and I had just had our first baby 4 months prior to these pics. This was our first roadtrip with her. I am a big Tim Burton fan and I was so happy to be able to go to an exhibition in Toronto. It was amazing! When I look at these pics, I am astounded by how quickly time goes. 3 years is not a long time in my eyes but when I see how small Zoë was, I can’t believe it. She will be 4 this year and starting school and my other baby will be 2. The changes that occur in those few short years really are incredible. It kind of makes me sad in a way because I almost don’t even remember her being that small- how can that be?! When people say to “enjoy the baby years, it doesn’t last long”, they really are telling the truth.

tim burton1

March 8, 2011

March 8, 2011


Throwback Thursday

Yum Yum!

Standard

I love love love rice pudding! I don’t have it often enough and right now I am not having it at all 😦  I gave up sweets for Lent and rice pudding is a dessert for me. Although, I just read an article about healthy breakfasts and guess what? Rice pudding was one of them! What?! I never even thought to have that for breakfast but I am going to definitely do that one- can’t wait! I had never made it homemade before. My favourite brand is Kozy Shack. I thought I would give it a go and see if I could do a better homemade one. In my opinion, this recipe is the best ever!!! The rice pudding was so delicious and it is now my “go-to”. I will never make another one. Give it a try, you won’t be disappointed!

________________________________________________________________________________

Rice Pudding

________________________________________________________________________________

2 cups cooked Arborio rice

2.5 cups milk, divided

1/3 cup + 1 tsp white sugar

1/4 teaspoon salt

2 eggs, beaten

2 tablespoon butter

1 teaspoon vanilla extract

1/2-1 tsp cinnamon

½ cup raisins (optional)


Directions:

  1. In medium saucepan, combine cooked rice, 2 cups milk, sugar and salt.
  2. Cook over medium heat until thick and creamy, 15 to 20 minutes.
  3. Stir in remaining 1/2 cup milk, and beaten egg.
  4. Cook 2 minutes more, stirring constantly.
  5. Add raisins(if using).
  6. Remove from heat, and stir in butter and vanilla.
  7. Serve warm or chilled, sprinkled with nutmeg or cinnamon.

Notes:

  • For yummy bit of underlying flavor, add about 1/4 tsp cinnamon to water when making the rice
  • Also great with fresh whipped cream and a cherry, and/or a tsp or 2 of maraschino cherry juice!
  • Can also use instant rice instead of Arborio
  • Soak raisins in boiling hot water beforehand, to get juicy plump raisins

________________________________________________________________________________

(adapted from) Source: http://tierneytavern.blogspot.ca/2011/05/rice-pudding.html

________________________________________________________________________________

Wicked Wednesday… Special Edition

Standard

I am Canadian and I LOVE Canadian music. We have so many amazing artists in this country and I am featuring one of them today. It is sort of connected to my last Flashback Thursday. It has been 10 years since George and I had our 1st “going-out” date. We went to see this artist at a small club and I have been a fan ever since. If you have the chance, check him out!

Matt Mays

matt mays

Matt Mays- March 2004

Yum Yum!

Standard

________________________________________________________________________________

Quinoa Chicken Chili

________________________________________________________________________________

1 box (225g) of PC Vegetable Quinoa with seasoning, or 1 cup- rinsed

1 (28 oz) can of diced tomatoes

1 (14 oz) can diced tomatoes with seasoning

2 (16 oz) cans of beans, rinsed, drained (black, kidney, mixed, pork and beans)

1 (15 oz) can of corn, drained

2 – 3 cups chicken stock

2 large chicken breasts, frozen or thawed

1 tsp garlic powder

2 tsp cumin

2 tsp chili powder

Toppings- sour cream, salsa, cheese, avocados (optional)


Directions:

  1. Toss everything into slow cooker and cook for 6-8 hours on low or 4-7 hours on high. I added frozen chicken breasts to mine and cooked on high for about six hours. As long as the chicken is cooked – it’s done!
  2. Remove chicken and shred it with two forks. Return to slow cooker.
  3. Top with cheese, sour cream, salsa, avocados etc.

Notes:

  • if thick enough the next day, you could eat it in a tortilla as well


________________________________________________________________________________

Source: http://queenbeecoupons.com/crock-pot-slow-cooker-quinoa-chicken-chili-recipe/

________________________________________________________________________________

Yum Yum!

Standard

________________________________________________________________________________ 

Easy Pumpkin Muffins

________________________________________________________________________________


1 14 oz. can pumpkin

¾  cup white sugar

1 egg

1/3 cup melted margarine or butter

1 tsp. baking soda

1 tsp.baking powder

½ tsp.salt

½ tsp. cinnamon

½ tsp. nutmeg

1 ½ cups flour

1 cup raisins 


Directions:

  1. Mix the pumpkin, sugar, egg and margarine together. Set aside.
  2. In a separate bowl, mix together baking soda, baking powder, salt and flour.
  3. Mix wet and dry ingredients all together, and stir well!
  4. Pour into greased muffin tins, and bake at 350° for approximately 20 minutes.

Notes:

  • Optional- I put a crumbly coating on top. Mix some oatmeal, brown sugar and melted butter to make a crumbly topping and top muffins*
  • These are much more flavourful the next day, and they freeze very nicely too!

Yields: 12 large muffins

________________________________________________________________________________

Source: http://www.catcancook.com/easy-pumpkin-muffin-recipe/

________________________________________________________________________________