Tag Archives: dessert

YUM YUM!

Standard

_________________________________________________________________________________________

YUM YUM!

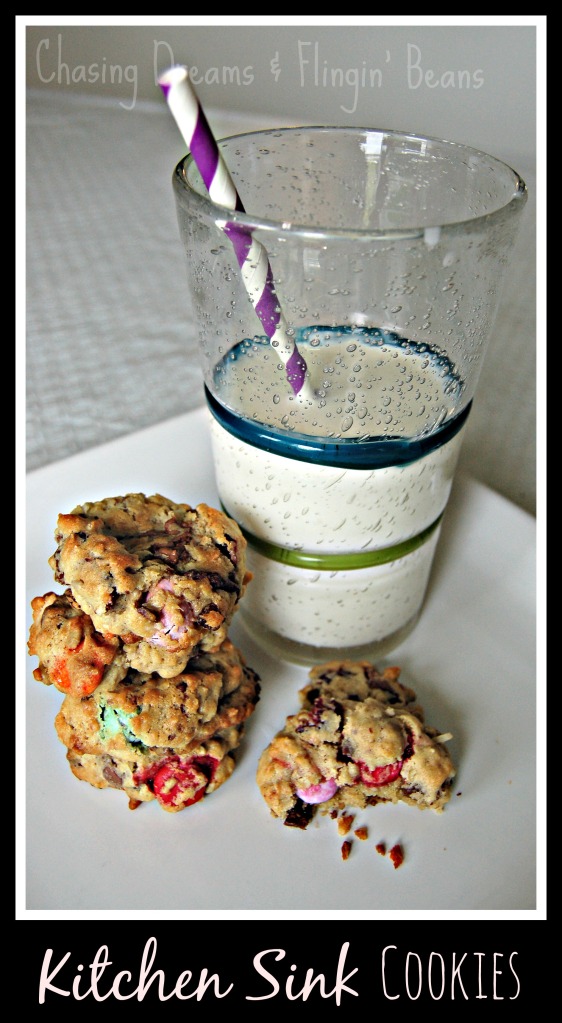
Kitchen Sink Cookies

_________________________________________________________________________________________

So, I came up with my own recipe in hopes of “getting rid” of some of the Easter candy we got. I have 2 small girls and they really don’t need it. And quite frankly, neither do my hubby and I. I decided to make some cookies and threw whatever I had in the bowl into these cookies. I ended up getting these “Kitchen Sink Cookies”! They have all kinds of stuff and I managed to sneak in some relatively “healthier items” as well. The Easter bunny did an egg hunt at our house and we had plastic eggs with raisins, craisins, smarties, mini eggs etc.  So, I mixed them all together and used them in our cookies. They turned out quite good, were very moist and they used up alot of our Easter goodies. I even managed to get rid of some cookies at my brother’s birthday so I don’t have to eat all of them myself!  I think I will be doing this at Halloween and Christmas as well.

Kitchen Sink Cookies

1 ½ cups all-purpose flour
½ cup oatmeal
½ cup brown sugar
1 tsp. salt
1 tsp. baking soda
1 Tbsp. ground flaxseed
¾ cup butter, softened
2 eggs
1 tsp. vanilla
¼ cup coconut

2 cups mix- craisins, raisins, sunflower seeds,  mini eggs, smarties, broken up chocolate eggs
(add any candies/chocolates you have lying around and want to use up)

Directions

  1. Preheat oven to 375° F.
  1. Combine flour, oatmeal, brown sugar, salt, baking soda, ground flaxseed, coconut and butter. Mix well.
  1. Add eggs and vanilla. Mix.
  1. Add the coconut and 2 cups of mix (your choice). Mix until blended.
  1. Spoon out onto parchment lined baking sheet. I used a cookie scoop. Lightly flatten tops with fork (they will not spread very much).
  1. Bake for approximately 8-10 minutes. Cool on rack and enjoy!


Notes

  • it is a good way to use up leftover Easter, Halloween, Christmas candies/chocolates with a little twist of healthy!


Yields: 2 ½ – 3 dozen (depending on size)


_________________________________________________________________________________________

Source: Chasing Dreams & Flingin’ Beans

_________________________________________________________________________________________
Yum Yum!

Standard

__________________________________________________________________________________________

Yum Yum!

 Ambrosia Salad

_________________________________________________________________________________________

This is the easiest salad ever! So delicious… I could eat the whole thing myself but I can’t. I have to share with the little babes! One of  Zoë’s favourite things is marshmallows so you know this is a major hit with her.

Ambrosia Salad

1 cup mandarin orange sections

1 cup pineapple tidbits

1 cup coconut

1 cup coloured miniature marshmallows

1 cup sour cream


Directions:

  1. Combine ingredients and allow to stand several hours before serving.
  2.  Line bowl with cupped lettuce leaves and spoon salad into bowl.


Yields: 6-7 Servings


__________________________________________________________________________________________

Source: Unknown

__________________________________________________________________________________________

Yum Yum!

Standard

I made this for my dad’s birthday one year and it was delicious! It does take a bit of prep work but it was actually pretty easy to do and I will definitely make it again. Perfect for a summer dessert.


__________________________________________________________________________________________

Banana Split Ice Cream Cake

_________________________________________________________________________________________

20 whole Oreo Cookies

4 Tablespoons Butter, Melted

4 whole Bananas

1 pint Strawberry Ice Cream

1 pint Vanilla Ice Cream

1 jar (about 16 Oz. Jar) Hot Fudge Sauce

1 container (16 Oz. Container) Frozen Sliced Sweetened Strawberries, Thawed And Drained

Fresh Whipped Cream, For Serving

Crushed Pineapple, For Serving


Directions

  1. Take out the strawberry ice cream to thaw. Place the Oreos in a gallon Ziploc bag and crush well with a rolling pin or small frying pan. Pour the melted butter into the Ziploc bag and mix it up. Press this crumb mixture into the bottom of a springform pan.
  1. Slice the bananas into 1/2″ rounds and arrange in a single layer on top of the crust. (Use as many banana slices as needed to fill the layer.) Place the pan into the freezer for about 10 minutes.
  1. Scoop the softened strawberry ice cream in small scoops on top of the frozen banana layer, smoothing it together with a spoon dipped in warm water. Return to the freezer for 1-2 hours, until the ice cream is firm again.
  1. Take the vanilla ice cream out of the freezer to thaw. Warm the hot fudge sauce slightly, just until it is easily spreadable. Pour the fudge over the strawberry ice cream layer, smoothing the top, and place back into the freezer for 15 minutes or so, until the fudge has firmed up again.
  1. Scoop the softened vanilla ice cream in small scoops on top of the fudge layer, again smoothing it together with the back of a spoon dipped in warm water. Cover with plastic wrap and return to the freezer for at least another 4-6 hours until very firm. (At this point the cake could be frozen, well wrapped, for a week or longer!)
  1. Pour the drained sliced sweetened strawberries into a bowl and crush with a pastry blender or a fork until the berries are all mashed up. Store in the fridge until almost ready to serve the cake.
  1. Spread the crushed berries over the top of the cake, to within one-half inch of the edge. Serve with fresh whipped cream and crushed pineapple for those who want it!


Prep Time: 8 Hours
Yields: 12 servings

__________________________________________________________________________________________

Source: http://arthomas.blogspot.ca/2010/01/banana-split-ice-cream-cake.html

__________________________________________________________________________________________

Yum Yum!

Standard

I love love love rice pudding! I don’t have it often enough and right now I am not having it at all 😦  I gave up sweets for Lent and rice pudding is a dessert for me. Although, I just read an article about healthy breakfasts and guess what? Rice pudding was one of them! What?! I never even thought to have that for breakfast but I am going to definitely do that one- can’t wait! I had never made it homemade before. My favourite brand is Kozy Shack. I thought I would give it a go and see if I could do a better homemade one. In my opinion, this recipe is the best ever!!! The rice pudding was so delicious and it is now my “go-to”. I will never make another one. Give it a try, you won’t be disappointed!

________________________________________________________________________________

Rice Pudding

________________________________________________________________________________

2 cups cooked Arborio rice

2.5 cups milk, divided

1/3 cup + 1 tsp white sugar

1/4 teaspoon salt

2 eggs, beaten

2 tablespoon butter

1 teaspoon vanilla extract

1/2-1 tsp cinnamon

½ cup raisins (optional)


Directions:

  1. In medium saucepan, combine cooked rice, 2 cups milk, sugar and salt.
  2. Cook over medium heat until thick and creamy, 15 to 20 minutes.
  3. Stir in remaining 1/2 cup milk, and beaten egg.
  4. Cook 2 minutes more, stirring constantly.
  5. Add raisins(if using).
  6. Remove from heat, and stir in butter and vanilla.
  7. Serve warm or chilled, sprinkled with nutmeg or cinnamon.

Notes:

  • For yummy bit of underlying flavor, add about 1/4 tsp cinnamon to water when making the rice
  • Also great with fresh whipped cream and a cherry, and/or a tsp or 2 of maraschino cherry juice!
  • Can also use instant rice instead of Arborio
  • Soak raisins in boiling hot water beforehand, to get juicy plump raisins

________________________________________________________________________________

(adapted from) Source: http://tierneytavern.blogspot.ca/2011/05/rice-pudding.html

________________________________________________________________________________

Yum Yum!

Standard

________________________________________________________________________________

Smore’s Rice Krispies Squares

________________________________________________________________________________

3 Tbsp. butter

6 cups mini marshmallows, divided

3 cups rice krispies

1 1/3 cups broken up graham cracker pieces

3/4 cup chocolate chips

Directions

  1. Mix the rice krispies, graham cracker pieces, chocolate chips, and 3/4 cup marshmallows together in a large bowl. Set aside.
  2. Melt the butter in a large pan over medium heat. When it starts to brown a little, add the remaining 5 1/4 cups marshmallows and lower the heat to low, gently flipping and stirring until the marshmallows are melted.
  3. Moving briskly, scrape the melted marshmallows into the cereal mixture and stir quickly to combine. Dump the whole mixture into a 9×9″ pan and spread evenly into the corners. Let sit until set, then turn out and cut into 9 delicious squares.

Yields:  9×9″ pan


________________________________________________________________________________

Source: http://17andbaking.com/2013/06/13/smores-rice-krispies/

________________________________________________________________________________