Monthly Archives: July 2014

Tuesday Tidbit

Standard

Last year, I was determined to get rid of all my cooking magazines and loose papers. I came across this idea on Pinterest and LOVE it!

I took a cheap cardboard magazine holder and covered it in scrapbook paper. I did the same with the tabs and labelled different catagories. Now, all of my recipes that I would “like to try” are in one spot and catagorized when I’m looking for something specific. It cleans up a lot of paper junk. It gets tucked back on my shelf where I can get to it when I want.

I did all the crafting for it while watching t.v at night when the kids were in bed (which is when I get to do “my stuff”). Crafty projects make me happy and I feel good when things get a little bit more organized.

Here is the link if anyone wants to give it a go!

942490_10152166192923415_1722466311_n

1526735_10152166193228415_1554113231_n

1555524_10152166193498415_1503118020_n

Happy Crafting xo

Menu Plan Monday

Standard

Menu Plan Monday logo

July 28August 3rd


MondaySpaghetti and Marinara Sauce (link near bottom of page) / Salad

Tuesday– Leftovers

Wednesday– Turkey Pesto Crepes / Veggie Stix / Hummus

Thursday- Homemade Fish Sticks / Fries / Peas

Friday In-and-Out Burger / Macaroni Salad / Veggie Stix

Saturday Leftovers

Sunday– Crockpot Pesto Ranch Chicken / Rice / Mixed Veggies

Menu Plan Monday

Standard

Menu Plan Monday logo

July 21-27th


Monday– Pumpkin Graham Waffles with Choc. Chips / Apple Slices

Tuesday– Crockpot Roast Beef / Potatoes / Carrots

Wednesday– Leftovers

Thursday- Tuna Burgers / Veggie Stix & Hummus

Friday Chicken Fajitas / Salad

Saturday Cowboy Bean Stew / Biscuits

Sunday– Garlic Ranch Chicken Pizza / Salad


“FUN” Friday

Standard

BUCKET LIST – Challenge Completed!

I always try to think about how I could make someone feel better when they are having a rough time. This next post is somewhat of a sombre subject as so many people go through it and so many families lose a loved one. I have lost a few. My title “FUN” Friday is not to make light of this serious disease. I have always had a thought in the back of my head to do this one day and it has finally come.

The only time I have ever had long hair was in highschool- Grade 12/13. I have very thick hair and it is curly. It has gotten curlier since I had my girls. I am not the type to do all kinds of “fussin” when it comes to my hair so I have had it mid-length the majority of my life (except those few brave times when I dared to go short). I still always prefer it just below my ears.

I decided to “give it a go” and grow my hair out with encouragement from my hairdresser. It has taken quite awhile to grow it to the length I have  it. That’s about as far as I can go. It mostly grows out, not down. It’s almost, if not the same length as in highschool.

hair donation collage1

I didn’t want my hair to go to waste when someone could benefit from it. I started looking into donating my hair somewhere that makes wigs for people with cancer. I found a few but unfortunately my hair wasn’t long enough and it didn’t meet the requirements they wanted. I kept searching and stumbled upon a company in BC  named 360 Hair that will accept hair with a 6″ minimum ponytail (where mine was slightly over) that makes real hair wigs and donates them to people with cancer. They are in partnership with Canada Cancer Society and Pantene Beautiful Lengths.

I lost a neighbour friend when I was really young to Cancer. I lost my Grandpa to Cancer. I lost an Aunt to Cancer and last year I lost my high school friend to Cancer. I wanted to do something apart from monetary donations. I know in the big scheme of things, this is a tiny thing but I hope in some small way my “pony” donation will give someone a little bit of joy on their journey.

hair donation collage

Hugs to all xxx

Yum Yum!

Standard

____________________________________________________________________________________________

YUM YUM!

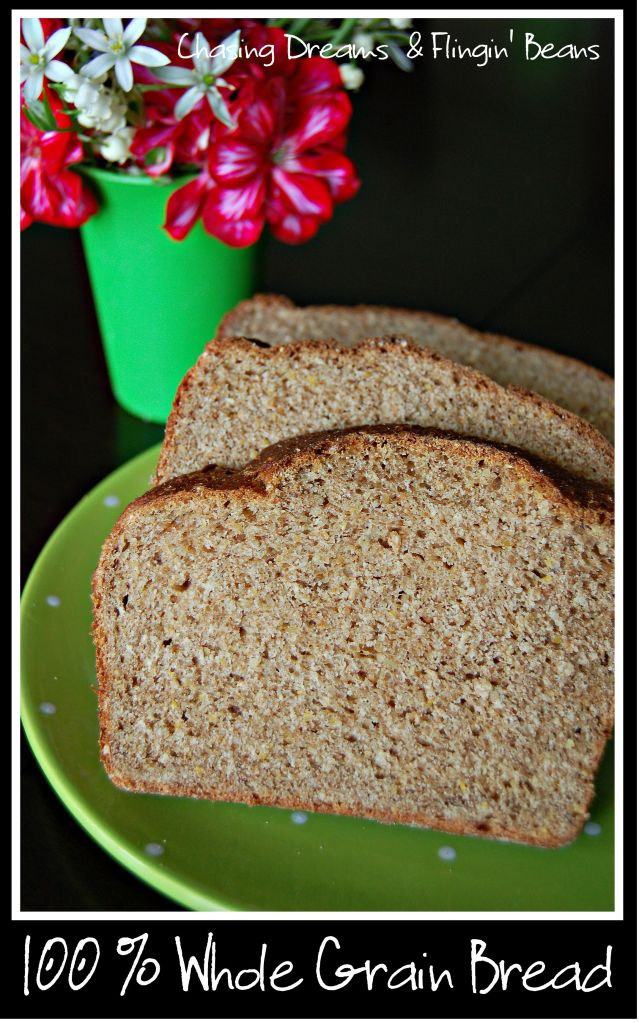
100 % Whole Grain Bread

Dairy Free

____________________________________________________________________________________________

With my youngest being on a Dairy-Free diet at the moment, I have been making her bread. I tried this one out and it was delicious! Really though, how can you go wrong with any type of homemade bread? It was a hit with her and that is all that matters. If I had more time, I may just consider making homemade bread every week…

100 Whole Grain Bread- DF


1¼ cups very warm water (but not hot or boiling)
2¾ tsp. dry active yeast
¼ cup grapeseed oil
¼ cup maple syrup
3 Tbsp. vital wheat gluten *
1½ tsp. salt
3 cups white-whole wheat flour, plus additional as needed *
¾ cup  Dry 10 Grain / 8 Grain or 7 Grain Hot Cereal *


Directions:

  1. Pour water in a large bowl. Sprinkle with yeast and let sit for 5 minutes. If it doesn’t become foamy, your yeast may be old and inactive. Consider starting over with fresh yeast.
  2. Stir the oil, sweetener, gluten, salt, 1 cup flour, and the 8-grain mix into the yeast-water mixture, mixing until well combined (by hand or using a mixer with the dough hook attachment). Add 2 cups wheat flour, and mix again until well combined. Begin kneading with your hands when it becomes too thick to stir.
  3. If the dough is too sticky to handle, add more flour, 1 tablespoon at a time, until it is still a little tacky, but doesn’t stick significantly to your hands. The 8-grain mix will soak up some of the moisture as it cooks, so you don’t want the dough to be on the dry side.
  4. Knead the dough for a few minutes. Place dough back in the bowl, cover, and let rise in a warm, draft-free place for about 1 hour.
  5. Thoroughly grease and flour a 9×5-inch loaf pan.
  6. Punch dough down, and briefly knead to get any air bubbles out. Shape dough into a loaf that will fit in your pan, folding under as you shape so that the seam is on the bottom. Plop the loaf shape into your prepared pan. Lightly cover (with plastic wrap or a damp tea towel) and let rise in a warm, draft-free place for 1 hour, or until it has risen to near a full loaf size, and the crown of the dough is peaking about an inch above the pan.
  7. Preheat your oven to 350ºF.
  8. Bake the bread in your preheated oven for 35 to 45 minutes, or until the crust is golden and relatively firm to the touch.
  9. Pop the loaf out and let it cool completely on a wire rack before wrapping in plastic wrap or storing in an airtight container at room temperature. If you are in a humid climate, you may need to refrigerate or freeze the loaf after 2 days to keep it fresh.

Notes:

  • * I used Bob’s Red Mill products

Prep time: 15 min.  Cook time: 40 min.  Total time: 55 min.

Yields: 12 slices

 ____________________________________________________________________________________________

Source: http://www.godairyfree.org/recipes/vegan-whole-grain-bread

____________________________________________________________________________________________

Menu Plan Monday

Standard

Menu Plan Monday logo

July 14-20th


MondayChili / Garlic Breadsticks / Veggie Stix

Tuesday– Teriyaki Turkey Meatballs / Rice / Carrots

Wednesday– Leftovers

Thursday- Balsamic Garlic Pork Tenderloin / Sweet Potato Fries / Mixed Veggies

Friday Bruschetta Chicken Skillet / Peas / Roasted Potatoes

Saturday Homemade Pizza /Salad

SundayMac & Cheese (Dairy Free) / Sausages


YUM YUM!

Standard

____________________________________________________________________________________________

YUM YUM!

Quinoa WOWBUTTER Chocolate Chip Muffins

Dairy Free – Nut Free

____________________________________________________________________________________________

I made these muffins when I was trying out a new quinoa recipe. I knew I would have leftover quinoa so I thought this was a perfect opportunity to use up the leftovers. They are dairy-free and nut-free as I used WOWBUTTER instead of peanut butter. I was pleasantly surprised how good they were and couldn’t really tell there was quinoa in them. They were really good the first day but didn’t stay fresh too long so I advise to eat them up quickly. They are perfect for snack time!

Quinoa Wow Butter Chocolate Chip Muffins- DF


1/4 cup quinoa
2/3 cup white wheat flour
2/3 cup white flour
2 tsp. baking powder
1/4 tsp. salt
1/2 cup brown sugar
1/4 cup wowbutter
1/4 cup unsalted margarine cut into small chunks (dairy free)
1 egg yolk, room temp
1 1/2 tsp. vanilla
2/3 cup dairy-free milk
1/2 cup chocolate chips dairy-free
2 egg whites, room temp

Directions:

  1. Fill medium saucepan with water and bring to boil on high heat.  Add quinoa, reduce heat, simmer until grains have popped open and appear translucent (about 12 minutes).  Drain grains in mesh strainer and rinse with cold water.
  2. Heat oven to 400.  Grease muffin tin.
  3. In medium bowl, whisk flours, baking powder, and salt.
  4. In large bowl with mixer on medium speed, beat together brown sugar, wowbutter, and margarine until smooth and creamy (5 minutes).  Beat in the egg yolk and vanilla until smooth, then beat in quinoa.  Reduce mixer speed to low and beat in milk.
  5. With rubber spatula, fold flour mixture into wet ingredients.  Fold in chocolate chips.
  6. In a clean, large bowl with mixer set on high speed and dry, clean betwers, beat the egg whites until soft peaks form (1 minutes).  Use spatula to gently fold the egg whites into the batter.
  7. Spoon each well of the muffin tin three-quarters full with batter.
  8. Bake the muffins until they’re brown and firm, about 20 minutes.  Turn the pan halfway through.  Cool in the pan for 5 minutes, then transfer to rack to completely cool.

Freezer

  • Place muffins on cookie sheet to flash freeze
  • Store frozen muffins in a freezer bag for up to 4 months
  • Defrost over night at room temperature
  • Bake again at 300 for 20 minutes or heat in microwave for 60 seconds.


____________________________________________________________________________________________

Source: http://milkallergymom.blogspot.ca/2012/09/quinoa-peanut-butter-chocolate-chip.html

____________________________________________________________________________________________


Throwback Thursday

Standard

I am only going back two weeks! Is that far enough? It has been a zoo around here and I am now just getting to some of my photos! Two weeks ago- my baby graduated Pre-School. It was a fun morning and I am thankful to my family for showing up and making her feel so important 🙂 She was very excited to have all of us there.

It’s still sinking in that she will not be with me everyday come September. She has been at my side for the past 4 years. I am going to take this hard. She is ready. She is excited. I am not. I can’t stand the thought of not having her by my side. It’s going to be a hard one for me. My eyes are welling up as I write this. As much as you want them to grow up happy, making friends, learning independence, being challenged- how do you let them go? You have to place so much trust in the “new circle” of people that they will be with everyday and you really don’t even know them- the teachers, the bus drivers, even the friends parents. I know every parent has went through this but she is my first. I have not went through this and it scares me. I know we will adjust in time but right now, it’s the great unknown…

Here are a couple of pics from September 2013- her first day of Pre-School 🙂

zoe preschool grad- 2013 TT-2 zoe preschool grad- 2013 TT


And here is a collage from two weeks ago as she graduated Pre- School ❤

zoe preschool grad

Tuesday Tidbit- Art Show

Standard

Having two little kids, sometimes has us missing out on things. It makes you feel bad but as mom’s and dad’s, we know what we have to do and just do it. I had to miss my niece’s highschool graduation, mainly because of the time. The munchkin’s were heading to bed at the start of the ceremony. I wished I could have been there to see her get her diploma as well as receive two awards. Way to go Darion! So proud of you…

However, I did get to support her another way. At the end of the school year, her art class put on an art show and each student picked 5 pieces of their art to display. It was a great evening, seeing how much talent she/they (the other students) possess. I wish her nothing but the best as she follows her dreams and desires. I really look forward to seeing more of her creative pieces as time goes on.

darion art show


Menu Plan Monday

Standard

Menu Plan Monday logo

July 7-13th


Monday– Teriyaki Chicken Casserole / Corn

Tuesday– Loaded Burritos (Dairy Free) / Veggie Stix / Hummus

Wednesday– Pulled Pork / Coleslaw / Veggie Stix

Thursday Leftovers

Friday– Baked Falafel Sandwiches  (Dairy Free)/  Salad

Saturday Mac & Cheese (Dairy Free) / BBQ Sausages

Sunday– Easy Chicken Cordon Bleu / Rice / Broccoli