Tag Archives: baking

YUM YUM!

Standard

____________________________________________________________________________________________

YUM YUM!

Chocolate Mud Muffins

Egg Free & Dairy Free

____________________________________________________________________________________________

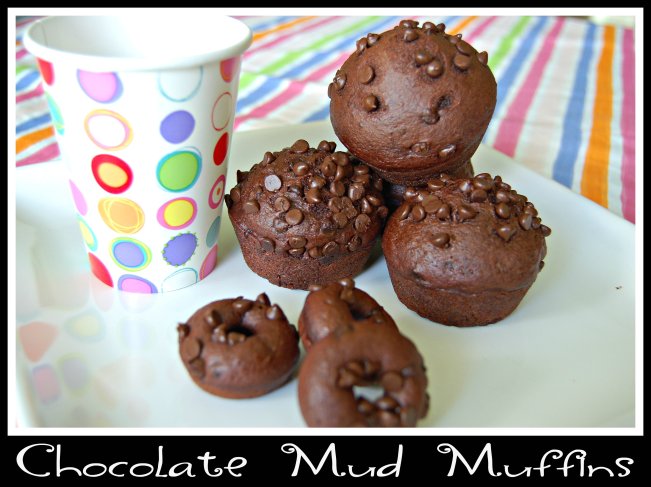
We love reading here. We go through so many books. One we read quite often is the “If You Give A Moose A Muffin“. We actually have the treasury and have read them all. They are fun and they have songs and recipes included in each one. My girl wanted to try the “Chocolate Mud Muffins” one day. Since, my baby is now on an no dairy-no egg diet, I thought I would improvise a bit. I substituted the buttermilk for coconut milk and used safe chocolate chips. They turned out awesome! They were so good. As you can see from the picture, I made muffins and some mini donuts. Fun Fun!

DSC_0001

2 cups flour

1 1/4 cup sugar

1/3 cup cocoa

1 tsp cinnamon

1 1/4 tsp baking soda

1/2 tsp salt

1 1/4 cup buttermilk (I used coconut milk)

1/4 cup vegetable oil

2 tsp vanilla

Moose TreatsChoose 1 or more of these to total one cup:

– chocolate chips

– chocolate-covered peanuts

– chocolate-covered peanut butter pieces

Directions:

  1. Turn on oven to 400 degrees F. Make sure rack is in center of oven. Generously spray or grease muffin cups and the top of a tin.
  2. In a large bowl, with a fork or whisk, combine the flour, sugar, cocoa, baking soda, cinnamon, and salt. In a medium bowl, mix buttermilk, oil, and vanilla. Add the wet mixture to the dry mixture, then stir just until combined. In 2 or 3 strokes stir in moose treats. (Optional: hold back about 1/4 cup of moose treats to sprinkle on top)
  3. Divide the “mud” equally among muffin cups, then sprinkle the remaining treats on top, if you wish. (You can taste the batter – no eggs!) Bake about 25-30 minutes or until the tops are very well cooked.


Yields: 12 muffins

 ____________________________________________________________________________________________

Source: http://www.myreadablefeast.com/2007/02/27/give-a-moose-an-eggless-muffin/

____________________________________________________________________________________________
Yum Yum!

Standard

____________________________________________________________________________________________
YUM YUM!

100 % Whole Grain Bread

Dairy Free

____________________________________________________________________________________________

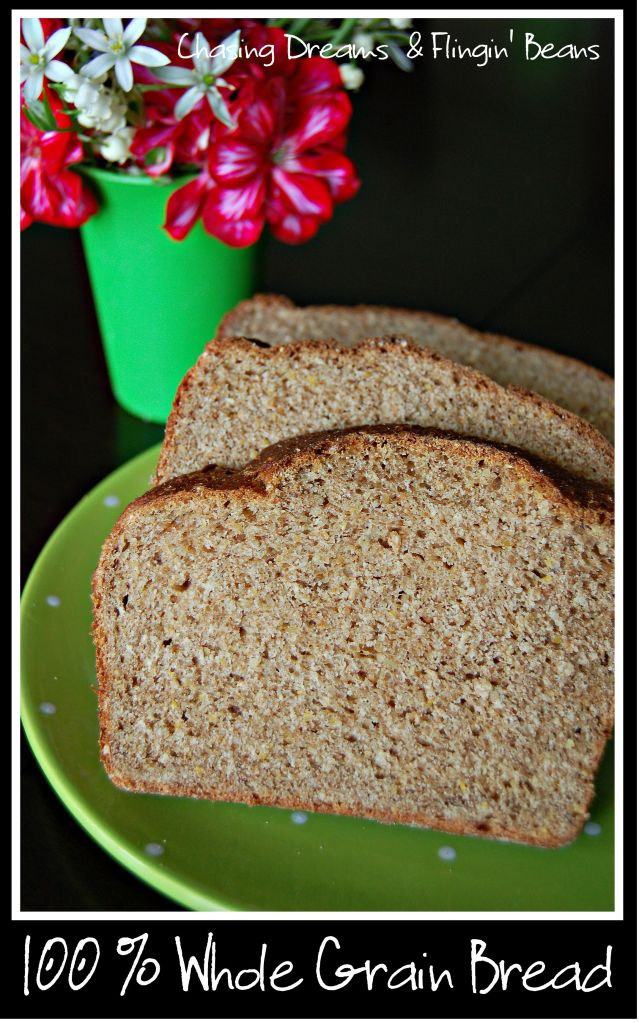
With my youngest being on a Dairy-Free diet at the moment, I have been making her bread. I tried this one out and it was delicious! Really though, how can you go wrong with any type of homemade bread? It was a hit with her and that is all that matters. If I had more time, I may just consider making homemade bread every week…

100 Whole Grain Bread- DF


1¼ cups very warm water (but not hot or boiling)
2¾ tsp. dry active yeast
¼ cup grapeseed oil
¼ cup maple syrup
3 Tbsp. vital wheat gluten *
1½ tsp. salt
3 cups white-whole wheat flour, plus additional as needed *
¾ cup  Dry 10 Grain / 8 Grain or 7 Grain Hot Cereal *


Directions:

  1. Pour water in a large bowl. Sprinkle with yeast and let sit for 5 minutes. If it doesn’t become foamy, your yeast may be old and inactive. Consider starting over with fresh yeast.
  2. Stir the oil, sweetener, gluten, salt, 1 cup flour, and the 8-grain mix into the yeast-water mixture, mixing until well combined (by hand or using a mixer with the dough hook attachment). Add 2 cups wheat flour, and mix again until well combined. Begin kneading with your hands when it becomes too thick to stir.
  3. If the dough is too sticky to handle, add more flour, 1 tablespoon at a time, until it is still a little tacky, but doesn’t stick significantly to your hands. The 8-grain mix will soak up some of the moisture as it cooks, so you don’t want the dough to be on the dry side.
  4. Knead the dough for a few minutes. Place dough back in the bowl, cover, and let rise in a warm, draft-free place for about 1 hour.
  5. Thoroughly grease and flour a 9×5-inch loaf pan.
  6. Punch dough down, and briefly knead to get any air bubbles out. Shape dough into a loaf that will fit in your pan, folding under as you shape so that the seam is on the bottom. Plop the loaf shape into your prepared pan. Lightly cover (with plastic wrap or a damp tea towel) and let rise in a warm, draft-free place for 1 hour, or until it has risen to near a full loaf size, and the crown of the dough is peaking about an inch above the pan.
  7. Preheat your oven to 350ºF.
  8. Bake the bread in your preheated oven for 35 to 45 minutes, or until the crust is golden and relatively firm to the touch.
  9. Pop the loaf out and let it cool completely on a wire rack before wrapping in plastic wrap or storing in an airtight container at room temperature. If you are in a humid climate, you may need to refrigerate or freeze the loaf after 2 days to keep it fresh.

Notes:

  • * I used Bob’s Red Mill products

Prep time: 15 min.  Cook time: 40 min.  Total time: 55 min.

Yields: 12 slices

 ____________________________________________________________________________________________

Source: http://www.godairyfree.org/recipes/vegan-whole-grain-bread

____________________________________________________________________________________________

YUM YUM!

Standard

____________________________________________________________________________________________

YUM YUM!

Quinoa WOWBUTTER Chocolate Chip Muffins

Dairy Free – Nut Free

____________________________________________________________________________________________
I made these muffins when I was trying out a new quinoa recipe. I knew I would have leftover quinoa so I thought this was a perfect opportunity to use up the leftovers. They are dairy-free and nut-free as I used WOWBUTTER instead of peanut butter. I was pleasantly surprised how good they were and couldn’t really tell there was quinoa in them. They were really good the first day but didn’t stay fresh too long so I advise to eat them up quickly. They are perfect for snack time!

Quinoa Wow Butter Chocolate Chip Muffins- DF


1/4 cup quinoa
2/3 cup white wheat flour
2/3 cup white flour
2 tsp. baking powder
1/4 tsp. salt
1/2 cup brown sugar
1/4 cup wowbutter
1/4 cup unsalted margarine cut into small chunks (dairy free)
1 egg yolk, room temp
1 1/2 tsp. vanilla
2/3 cup dairy-free milk
1/2 cup chocolate chips dairy-free
2 egg whites, room temp

Directions:

  1. Fill medium saucepan with water and bring to boil on high heat.  Add quinoa, reduce heat, simmer until grains have popped open and appear translucent (about 12 minutes).  Drain grains in mesh strainer and rinse with cold water.
  2. Heat oven to 400.  Grease muffin tin.
  3. In medium bowl, whisk flours, baking powder, and salt.
  4. In large bowl with mixer on medium speed, beat together brown sugar, wowbutter, and margarine until smooth and creamy (5 minutes).  Beat in the egg yolk and vanilla until smooth, then beat in quinoa.  Reduce mixer speed to low and beat in milk.
  5. With rubber spatula, fold flour mixture into wet ingredients.  Fold in chocolate chips.
  6. In a clean, large bowl with mixer set on high speed and dry, clean betwers, beat the egg whites until soft peaks form (1 minutes).  Use spatula to gently fold the egg whites into the batter.
  7. Spoon each well of the muffin tin three-quarters full with batter.
  8. Bake the muffins until they’re brown and firm, about 20 minutes.  Turn the pan halfway through.  Cool in the pan for 5 minutes, then transfer to rack to completely cool.

Freezer

  • Place muffins on cookie sheet to flash freeze
  • Store frozen muffins in a freezer bag for up to 4 months
  • Defrost over night at room temperature
  • Bake again at 300 for 20 minutes or heat in microwave for 60 seconds.


____________________________________________________________________________________________

Source: http://milkallergymom.blogspot.ca/2012/09/quinoa-peanut-butter-chocolate-chip.html

____________________________________________________________________________________________


YUM YUM!

Standard

____________________________________________________________________________________________

YUM YUM!

Sunbutter Chocolate Chip Oat Cookies

Dairy Free

____________________________________________________________________________________________

These are one of the best cookies I have ever made and I have made alot! I think this is my new favourite as well as the rest of the family. They were a big hit and I am so happy because I hadn’t tried too many dessert-y type “Dairy Free” recipes yet and this has got me off on the right foot! Give these a try… you can’t just eat one! 😉


Sunbutter Chocolate Chip Oat Cookies


1 cup sugar

1/3 cup Sunbutter

1/3 cup soy milk

2 tbsp oil

2 tsp vanilla extract

1 cup flour

1 cup oats

1/2 tsp baking soda

1/2 tsp salt

1/2 – 1 cup safe chocolate chips


Directions:

  1. Stir the sugar, sunbutter, soy milk, oil and vanilla until smooth.
  2. In a separate bowl, combine the flour, oats, baking soda and salt.
  3. Add the flour mixture to the sunbutter mixture then mix until thoroughly combined.
  4. Fold in the chocolate chips.
  5. Drop by large spoonfuls 2″ apart onto parchment paper lined baking sheets.
  6. Bake at 425° for 7-9 minutes or until the bottoms begin to brown. The cookies will look under-cooked, but they will become set once they sit on the sheet for a minute or two. Watch the cookies carefully because the bottoms will begin to burn quickly.


Yields: approx. 2 dozen


____________________________________________________________________________________________

Source: http://jazzyallergyrecipes.blogspot.ca/2011/05/egg-free-dairy-free-nut-free-sunbutter.html

____________________________________________________________________________________________

I think the cookies are a hit!

I think the cookies are a hit!

YUM YUM!

Standard

_________________________________________________________________________________________

YUM YUM!

Wild Blueberry Muffins

Dairy Free

_________________________________________________________________________________________

Cooking this week has been turned upside down. My youngest baby has been put on a No Dairy diet and I was feeling a little overwhelmed by it all. She has terrible eczema and we are wanting to find out what is causing it. The poor thing is having to wear tights in this warm/hot weather because she scratches whenever she can feel her bare legs. So, I have been on the hunt for new recipes that don’t require dairy products (thank goodness for Pinterest!) I made these muffins yesterday and they were delicious- very moist and lots of blueberries… yum! I used soy milk as a replacement and I was pleasantly surprised with how good they are. I will be posting more dairy free recipes as I go along if they are good 😉

DSC_0027


1-1/2 cups all-purpose flour (can sub whole wheat pastry flour for all or part)

1 Tbsp. baking powder

¼ tsp. salt

¼ cup brown sugar

¼ cup + 1 tablespoon granulated sugar, divided

2 tsp. lemon juice or apple cider vinegar + enough dairy-free milk alternative to equal ¾ cup

½ cup (4 ounces) egg substitute or 2 large eggs

2-1/2 Tbsp. grapeseed, canola, or melted coconut oil

2 cups Wild Blueberries

½ tsp. ground cinnamon


Directions:

  1. Preheat your oven to 400º and grease 12 muffin cups or line them with cupcake liners.
  2. Combine the flour, baking powder and salt in a large bowl.
  3. In a separate bowl, whisk together the brown sugar, ¼ cup of the white sugar, lemon or vinegar with the milk alternative, egg substitute and oil.
  4. Add the wet mixture to the flour mixture and gently mix just to combine. Be careful not to over mix.
  5. Fold in the blueberries.
  6. Combine the remaining 1 tablespoon sugar and cinnamon in a small dish.
  7. Divide the batter between the prepared muffin cups and sprinkle each muffin with the sugar-cinnamon mixture.
  8. Bake for 18 to 22 minutes or until firm to the touch.


Prep: 15 min.  Cook:  20 min.    Total:  35 min.

Yields: 12 muffins


_________________________________________________________________________________________

Source: http://www.godairyfree.org/recipes/old-fashioned-dairy-free-blueberry-muffins

_________________________________________________________________________________________

YUM YUM!

Standard

_________________________________________________________________________________________

YUM YUM!

Kitchen Sink Cookies

_________________________________________________________________________________________

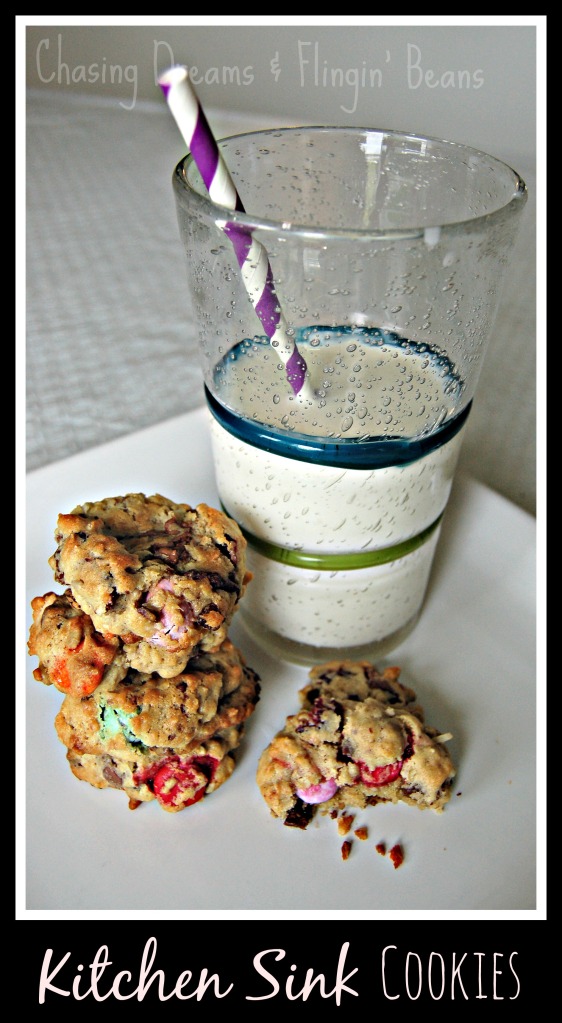
So, I came up with my own recipe in hopes of “getting rid” of some of the Easter candy we got. I have 2 small girls and they really don’t need it. And quite frankly, neither do my hubby and I. I decided to make some cookies and threw whatever I had in the bowl into these cookies. I ended up getting these “Kitchen Sink Cookies”! They have all kinds of stuff and I managed to sneak in some relatively “healthier items” as well. The Easter bunny did an egg hunt at our house and we had plastic eggs with raisins, craisins, smarties, mini eggs etc.  So, I mixed them all together and used them in our cookies. They turned out quite good, were very moist and they used up alot of our Easter goodies. I even managed to get rid of some cookies at my brother’s birthday so I don’t have to eat all of them myself!  I think I will be doing this at Halloween and Christmas as well.

Kitchen Sink Cookies

1 ½ cups all-purpose flour
½ cup oatmeal
½ cup brown sugar
1 tsp. salt
1 tsp. baking soda
1 Tbsp. ground flaxseed
¾ cup butter, softened
2 eggs
1 tsp. vanilla
¼ cup coconut

2 cups mix- craisins, raisins, sunflower seeds,  mini eggs, smarties, broken up chocolate eggs
(add any candies/chocolates you have lying around and want to use up)

Directions

  1. Preheat oven to 375° F.
  1. Combine flour, oatmeal, brown sugar, salt, baking soda, ground flaxseed, coconut and butter. Mix well.
  1. Add eggs and vanilla. Mix.
  1. Add the coconut and 2 cups of mix (your choice). Mix until blended.
  1. Spoon out onto parchment lined baking sheet. I used a cookie scoop. Lightly flatten tops with fork (they will not spread very much).
  1. Bake for approximately 8-10 minutes. Cool on rack and enjoy!


Notes

  • it is a good way to use up leftover Easter, Halloween, Christmas candies/chocolates with a little twist of healthy!


Yields: 2 ½ – 3 dozen (depending on size)


_________________________________________________________________________________________

Source: Chasing Dreams & Flingin’ Beans

_________________________________________________________________________________________

Yum Yum!

Standard

I made this for my dad’s birthday one year and it was delicious! It does take a bit of prep work but it was actually pretty easy to do and I will definitely make it again. Perfect for a summer dessert.


__________________________________________________________________________________________

Banana Split Ice Cream Cake

_________________________________________________________________________________________

20 whole Oreo Cookies

4 Tablespoons Butter, Melted

4 whole Bananas

1 pint Strawberry Ice Cream

1 pint Vanilla Ice Cream

1 jar (about 16 Oz. Jar) Hot Fudge Sauce

1 container (16 Oz. Container) Frozen Sliced Sweetened Strawberries, Thawed And Drained

Fresh Whipped Cream, For Serving

Crushed Pineapple, For Serving


Directions

  1. Take out the strawberry ice cream to thaw. Place the Oreos in a gallon Ziploc bag and crush well with a rolling pin or small frying pan. Pour the melted butter into the Ziploc bag and mix it up. Press this crumb mixture into the bottom of a springform pan.
  1. Slice the bananas into 1/2″ rounds and arrange in a single layer on top of the crust. (Use as many banana slices as needed to fill the layer.) Place the pan into the freezer for about 10 minutes.
  1. Scoop the softened strawberry ice cream in small scoops on top of the frozen banana layer, smoothing it together with a spoon dipped in warm water. Return to the freezer for 1-2 hours, until the ice cream is firm again.
  1. Take the vanilla ice cream out of the freezer to thaw. Warm the hot fudge sauce slightly, just until it is easily spreadable. Pour the fudge over the strawberry ice cream layer, smoothing the top, and place back into the freezer for 15 minutes or so, until the fudge has firmed up again.
  1. Scoop the softened vanilla ice cream in small scoops on top of the fudge layer, again smoothing it together with the back of a spoon dipped in warm water. Cover with plastic wrap and return to the freezer for at least another 4-6 hours until very firm. (At this point the cake could be frozen, well wrapped, for a week or longer!)
  1. Pour the drained sliced sweetened strawberries into a bowl and crush with a pastry blender or a fork until the berries are all mashed up. Store in the fridge until almost ready to serve the cake.
  1. Spread the crushed berries over the top of the cake, to within one-half inch of the edge. Serve with fresh whipped cream and crushed pineapple for those who want it!


Prep Time: 8 Hours
Yields: 12 servings

__________________________________________________________________________________________

Source: http://arthomas.blogspot.ca/2010/01/banana-split-ice-cream-cake.html

__________________________________________________________________________________________

Yum Yum!

Standard

__________________________________________________________________________________________

Pumpkin Chocolate Chip Cookies

_________________________________________________________________________________________

1/2 cup butter

1 cup canned pumpkin

1 cup sugar

1 egg, beaten lightly

1 tsp milk

1 tsp vanilla extract

2 cups all purpose flour

2 tsp baking powder

1 tsp baking soda

1 tsp cinnamon

1/2 tsp salt

1 cup chocolate chips

Directions


  1.  Preheat oven to 375F.
  2.  Place butter in heat proof glass dish. Cover and microwave butter on high power for 30 seconds.
  3.  In a large bowl mix together pumpkin, sugar, melted butter, beaten egg, milk and vanilla.
  4.  In a separate bowl combine flour, baking soda, baking powder, cinnamon and salt.
  5. Add pumpkin mixture and mix until smooth. Stir in chocolate chips.
  6. Drop from a teaspoon onto a lightly greased baking sheet. Line up about 1 1/2 inches apart.
  7. Bake for 10-12 minutes until golden brown. Cool on baking sheet for 2 minutes, then remove to wire rack for cooling.


Yields: 3 dozen

__________________________________________________________________________________________

Source: Unknown

__________________________________________________________________________________________

Yum Yum!

Standard

________________________________________________________________________________ 

Easy Pumpkin Muffins

________________________________________________________________________________


1 14 oz. can pumpkin

¾  cup white sugar

1 egg

1/3 cup melted margarine or butter

1 tsp. baking soda

1 tsp.baking powder

½ tsp.salt

½ tsp. cinnamon

½ tsp. nutmeg

1 ½ cups flour

1 cup raisins 


Directions:

  1. Mix the pumpkin, sugar, egg and margarine together. Set aside.
  2. In a separate bowl, mix together baking soda, baking powder, salt and flour.
  3. Mix wet and dry ingredients all together, and stir well!
  4. Pour into greased muffin tins, and bake at 350° for approximately 20 minutes.

Notes:

  • Optional- I put a crumbly coating on top. Mix some oatmeal, brown sugar and melted butter to make a crumbly topping and top muffins*
  • These are much more flavourful the next day, and they freeze very nicely too!

Yields: 12 large muffins

________________________________________________________________________________

Source: http://www.catcancook.com/easy-pumpkin-muffin-recipe/

________________________________________________________________________________

Yum Yum!

Standard

________________________________________________________________________________ 

Apple Dip with Cream Cheese, Caramel & Skor

________________________________________________________________________________

2 (8 oz.) package of cream cheese, softened

4 tbsp. brown sugar

1 (12 oz.) container caramel topping

2 “Skor” Chocolate Bars

6-8  apples of your choice


Directions:

  1. In a bowl, with an electric mixer, mix the cream cheese and the brown sugar until well blended.
  2. Spread the cheese mixture into a round glass pie baking dish.
  3. Chill for one hour.
  4. Spread the caramel topping over the cream cheese mixture in the dish.
  5. Chop the “Skor” chocolate bars into small pieces and sprinkle over the caramel topping.
  6. Serve with peeled or unpeeled apple slices.

Notes:

  •  For a smaller size dip- use 1 pkg. cream cheese, 2 Tbsp. brown sugar, 1 Skor bar
  • If possible, choose a variety of apple that does not discolour as quickly as other varieties of apple. Examples of the best choice for apples for dip are: “Granny Smith” and “Cortland”
  • You can also toss the prepared apple slices in a bowl with a little lemon juice to help the apples keep their colour longer
  • “Marzetti” Caramel Topping is also available in “Fat Free” and “Light”
  • If you’re really daring, experiment dipping with marshmallows or pretzels


________________________________________________________________________________

Source: not known

________________________________________________________________________________